In this part of the exercise, we will assume that we finished our first translation project and will now go on to a project, where we have to translate an update version of the document we have just translated.
In this update scenario, we will use the TM populated with the translations of the first project and also the termbase we used for the first project.
We will have to translate a document which is quite similar to the first one.
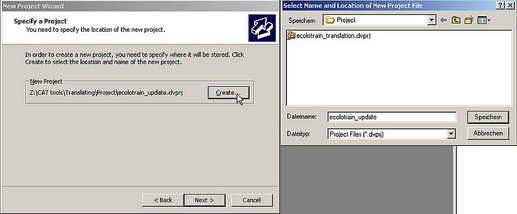
- In the first step, you need to define a new project in the same way as before by choosing Newfrom the File menu. In the New Project Wizard create a new project and save it in the folder Project in My Documents\CAT tools\Translating (name it e.g. ecolotrain_update.dvprj).
- Click on Next and choose the same source and target language as in the first project. When you are asked to specify the TM and then the termbase to be used, choose the TM and termbase created and/or used in first project (ecolotrain_tm_new.dvmdb as TM from the Project folder and ecolotrain_terms_en-xx.dvtdb as termbase from your language pair folder, with EN as source language).
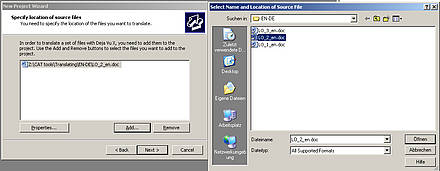
- As source text to be translated, choose from your language pair folder the file LO_2_en.doc.
- In the window where you have to specify client and subject field, leave again the client field empty and choose as Subject "004 - Computer Science and Technology. Computing".
- Clicking Next completes the definition of the project, clicking Finish starts the import of the file into Déjà Vu X and shows the file in the File Navigator.
- Double clicking on the file name in the File Navigator opens the file in the editor again.
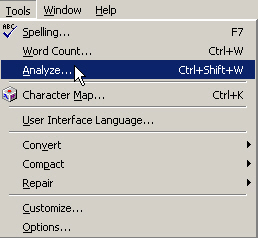
- Before starting to translate this update document, analyse it using the analysis feature of Déjà Vu X. This will provide information on the number of exact and fuzzy matches this document contains. It will also show how many segments are repeated twice or more in the document. To do this, choose the Option Analyzefrom the Tools menu.
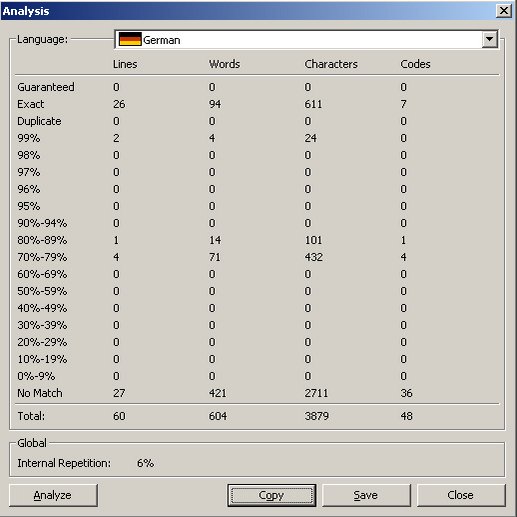
- In the Analyze dialog box click on the Analyze button. Déjà Vu X analyses the document on the basis of the TM and displays the results.
In this example, there are 26 segments ("Lines" in the Analysis window), which are exact matches, two 99% fuzzy matches, one fuzzy match between 80-89% four 70-79% fuzzy matches and 27 segments with No Match at all. You can close the Analysis window or save the result to a file. If you do so, choose your Project folder as location for the text file containing the result.
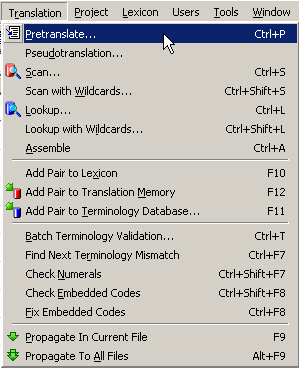
- From this analysis result, we can conclude that it might be worthwhile to let Déjà Vu X make a pretranslation. As such it will automatically translate all segments with exact matches in the TM. Choose the option Pretranslate from the Translation menu in Déjà Vu X.
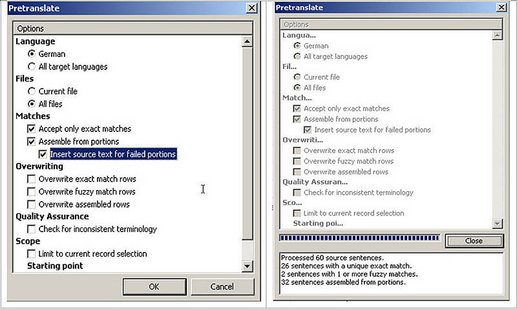
- In the Pretranslate dialog box select the options like in the following screenshot.
- In the Language option choose your target language, since your project does not contain any other languages. Since you are only translating one file, the setting in the Files option is irrelevant. Under Matches select Accept only exact matches, so that you do not get pretranslations for fuzzy matches, because there might be the danger that you forget to check translations of fuzzy matches afterwards. Under this option also select Assemble from portions and Insert source text for failed portions. Thus, Déjà Vu X will try to assemble translations for segments with no matches and will insert the source text in those cases where there are no portions available. In this exercise, use this option to have text inserted in all target segments, even if time will not allow the completion of the entire translation. At the end of the exercise you will export the translation work back into Word format again, without getting too many error messages from Déjà Vu X on missing target segments or embedded codes. The remaining options are only relevant, if pretranslation is carried out in a project where there were already some parts of the document translated and you want to control whether certain existing translations should be overwritten or not.
- When you have completed the settings of the Pretranslate options just click on OK and the pretranslation process is started. After completion, the result is displayed at the bottom of the Pretranslate options window.
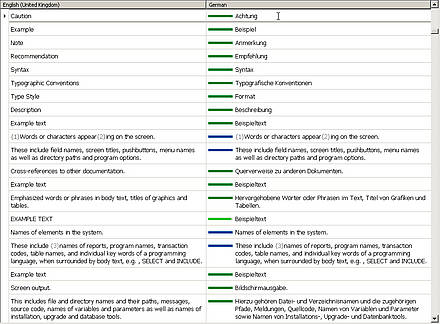
- The Déjà Vu X editor shows the result of the pretranslation process. The status of each segment is colour coded. Segments with a dark green bar are 100% matches from the TM(s) or the termbase(s), segments with a dark blue bar are segments which have been assembled because they do not have an exact match. The segments without a match have to be translated manually by the translator using the TM.
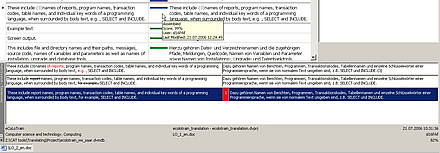
- You can now look through the pretranslated segments using Ctrl + DownArrow to go from one segment to the next and confirm the translation. When you come to a segment where you only see the source segment in the target cell, you have to enter a translation manually. Another possibility is to look in the AutoSearch-Sentences window at the bottom of the Déjà Vu Xscreen to view the fuzzy match(es) found in the TM for this segment. This information is accompanied by a match value on the right hand side of the window and some other information, like subject field, file name of the TM, project name of the fuzzy match etc.
The first four boxes in the AutoSearch-Sentences window contain the source sentence as it occurs in the current document, its translation found in the TM (including embedded codes) as well as the source sentence found in the TM together with the translation. In the source segments, the differences between the old and the new sentences are shown in red characters or marked as deleted.
The box with the blue background and the number (on red background) is the place where you can select the translation to be inserted in the target text part of the editor by double clicking on the number or somewhere else in the segment. If more than one match was found, they appear in this window below each other and you can select the translation you want by double clicking on it.
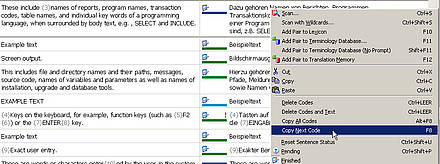
- Sometimes it might happen that in the target segment an embedded code is missing or is placed at the wrong position. In this case, you have to insert or move it manually. In order to insert a code manually, right click with your mouse at the position where the code has to be inserted and choose Copy Next code from the popup menu or press F8.
In order to move a code within the target segment, you can use the normal Windows operations for cutting and pasting text elements. Select the code to be moved in the target text, cut it using Ctrl + X, move the mouse pointer to the position where the code has to be inserted and paste it using Ctrl + V.
Continue translating in this way.


